Android-x86 on SD card with NTFS, Secure Boot and UEFI:
I will show you how to install the 64-bit version of Android-x86 7.1rc2 (and likely other versions such as CM14.1 rc1, or other operating systems based on Android-x86 such as RemixOS), on a SD/microSD card using NTFS as the filesystem (thus providing a fast Android experience) with Secure Boot and UEFI boot.
Most of the tutorials available on the web show how to install Android-x86 on a USB storage device. Even though I was able to find some information about how to install on a microSD card reader, I found no information whatsoever about doing so together with:
- Using NTFS (without giving up Secure Boot) – for performance reasons;
- What to do when the microSD card can be booted but Android-x86 never gets “detected”.
Using NTFS as the filesystem for storing Android-x86’s virtual partitions was a priority for me, since I originally tested Android-x86 on a cheap USB stick and observed that the performance/latency difference of EXT4 or FAT32 vs. NTFS was jaw-dropping, with the EXT4 or FAT32 being almost unusable.
I mentioned not giving up Secure Boot when using NTFS. Well, I would eventually have made the effort to give up Secure Boot in order to use Android-x86 with NTFS. However, I simply was not successful in booting to GRUB when using the card, but was successful when using the USD drive. Using the card simply printed the following and froze:
tGRUB Loading stage1.5.
So, to summarize, this post will allow you to:
- Install Android-x86 on a SD/microSD card (via a built-in reader);
- Work-around Android-x86’s rejection of some card readers;
- UEFI-boot into the Android-x86 installation
- Keep Secure Boot enabled
- Use NTFS as the filesystem for the Android virtual partitions, for high performance
- Use either a GPT or a MS-DOS partition table
- Keep using part of your SD card as a removable storage on Windows/Linux
And here are some quick links to the multiple sections:
- System configuration
- Prepare your devices
- Install Android-x86
- Making it boot
- Get the necessary kernel modules
- Happy booting
Before moving on, make sure that:
- Your computer includes a SD/microSD card reader;
- Your computer can UEFI-boot from said reader;
- You have access to parted or GParted (you can use an Ubuntu live image or the specialized Parted Magic live image for this);
The computer I have used for my installation was the Dell Latitude 7480, and from what I can gather any Dell E7x40, E7x50, E7x60, E7x70, 7x80 should work the same way, if not many others from Dell. I can’t guarantee that this post will work with your computer even if the above 2 points tick, since it will depend on the manufacturer of the card reader, as well as whether Linux kernel modules are available for it in Android-x86.
I will mention keyboard shortcuts, terminology, screens and show photographs from the Dell Latitude 7480. If you are using a different laptop, you’ll need to find the equivalent items. I will also mention microSD specifically from now on, since that’s the card type this laptop can read.
System configuration
Get to the BIOS setup tool of the computer (press F2 during the POST screen – right after turning on the computer) and:
- Make sure Legacy boot is disabled: Go to General, Advanced Boot Options and uncheck Enable Legacy Option ROMs;
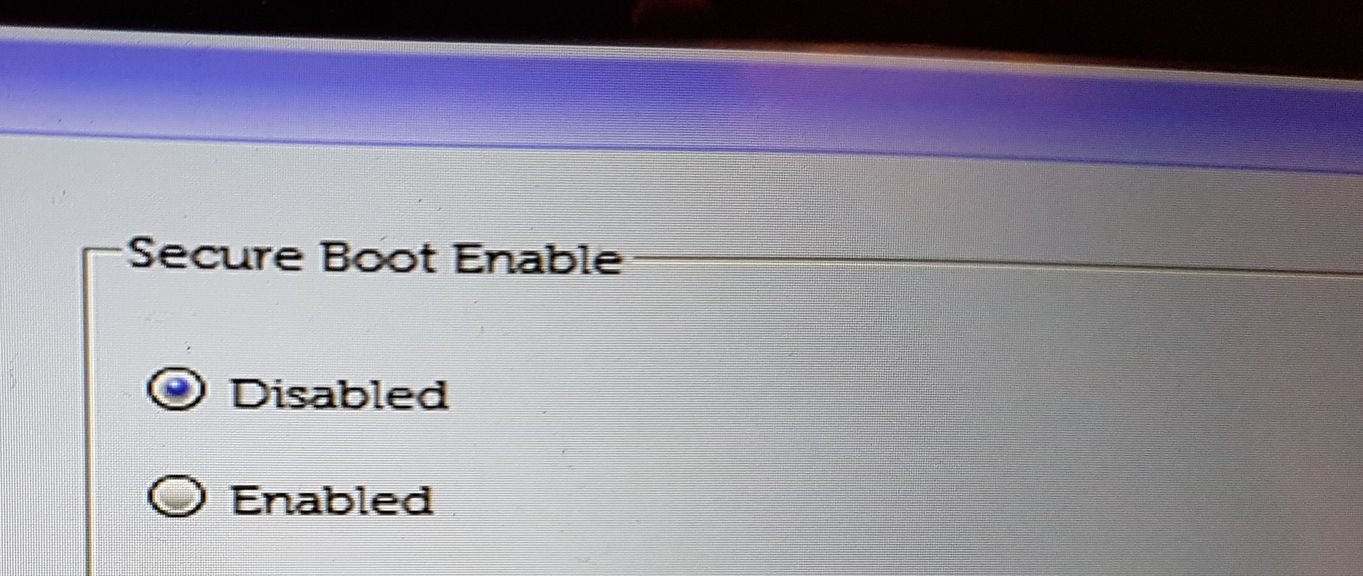
- Make sure Secure Boot is enabled: Go to Secure Boot, Secure Boot Enabled, and check Enabled;
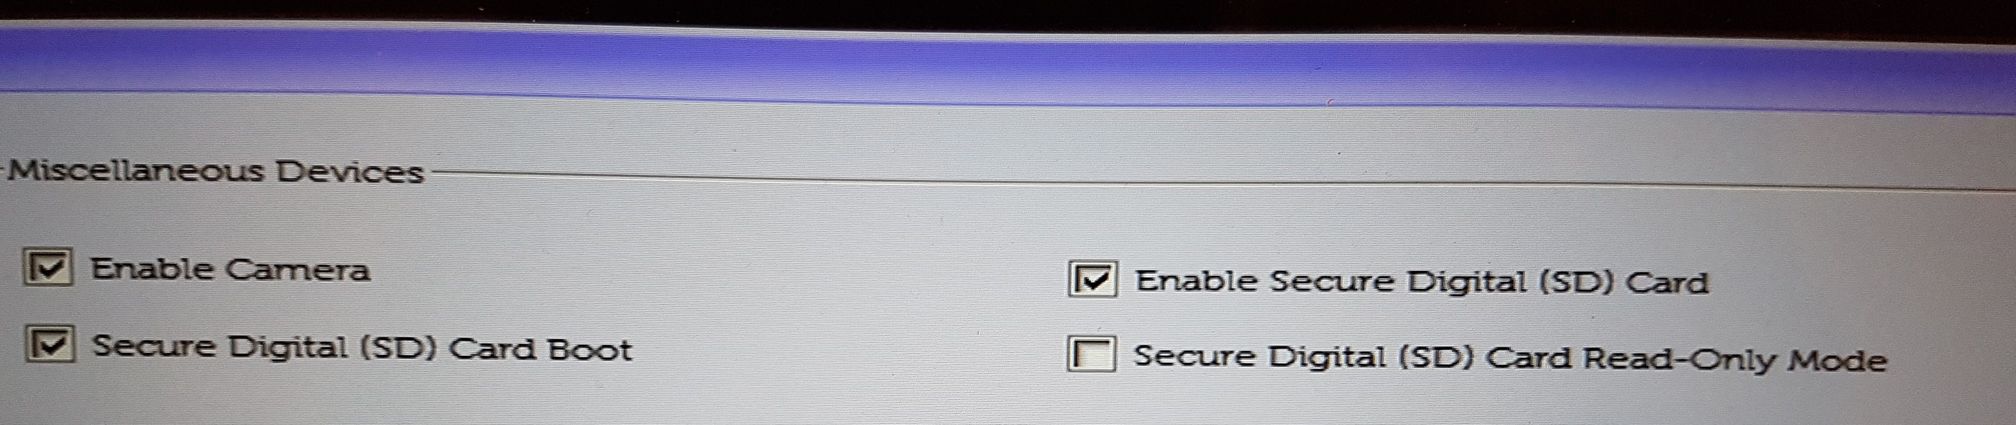
- Make sure SD card boot is enabled: Go to System Configuration, Miscellaneous Devices and check Secure Digital (SD) Card Boot.

Prepare your devices
You will need 2 or 3 devices:
- Flash Android-x86 7.1rc2 64bit to a USB drive(will be the installer) – you can use https://sourceforge.net/projects/win32diskimager/ for this;
- Grab a microSD card with at least 8GB of capacity (will be the destination of the installation)
- Optionally flash a live image to another USB drive, or use a live CD/DVD that provides the parted, GParted or equivalent tools for partitioning the microSD card – if you already have Linux on your computer you can simply use it.
The microSD card needs to have either a GPT or a MS-DOS partition table (I have used and tested MS-DOS, but GPT should work as well).
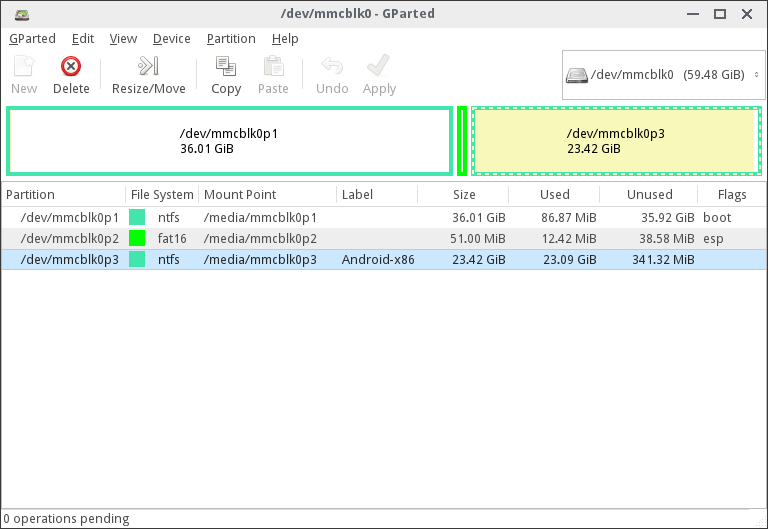
Then make sure the card has the following partitions in the following order:
- (optional) NTFS/FAT32/exFAT partition to be read by both Android and Windows/Linux – whatever capacity makes sense to you. It is VERY IMPORTANT that this partition be the first partition on the list, otherwise Windows will not be able to see it (Linux will still do the job). You must also set the
bootflag, which will tell Windows that this is the "active" partition.; - Tiny FAT16 partition (anything above 20 MB should be safe) – set the following flag:
efs(VERY IMPORTANT, otherwise you won't be able to boot the SD card); - All the remaining space should be converted to an NTFS partition with at least 4GB (the less you have here, the quicker Android will run out-of-space and become unstable… 4GB is extremely little in case you intend to install some of the most popular apps, to illustrate).
Install Android-x86
Turn the computer on again, with the Android-x86 installer USB drive plugged-in, and press the F10 key to launch the one-time boot menu. Choose the USB device.
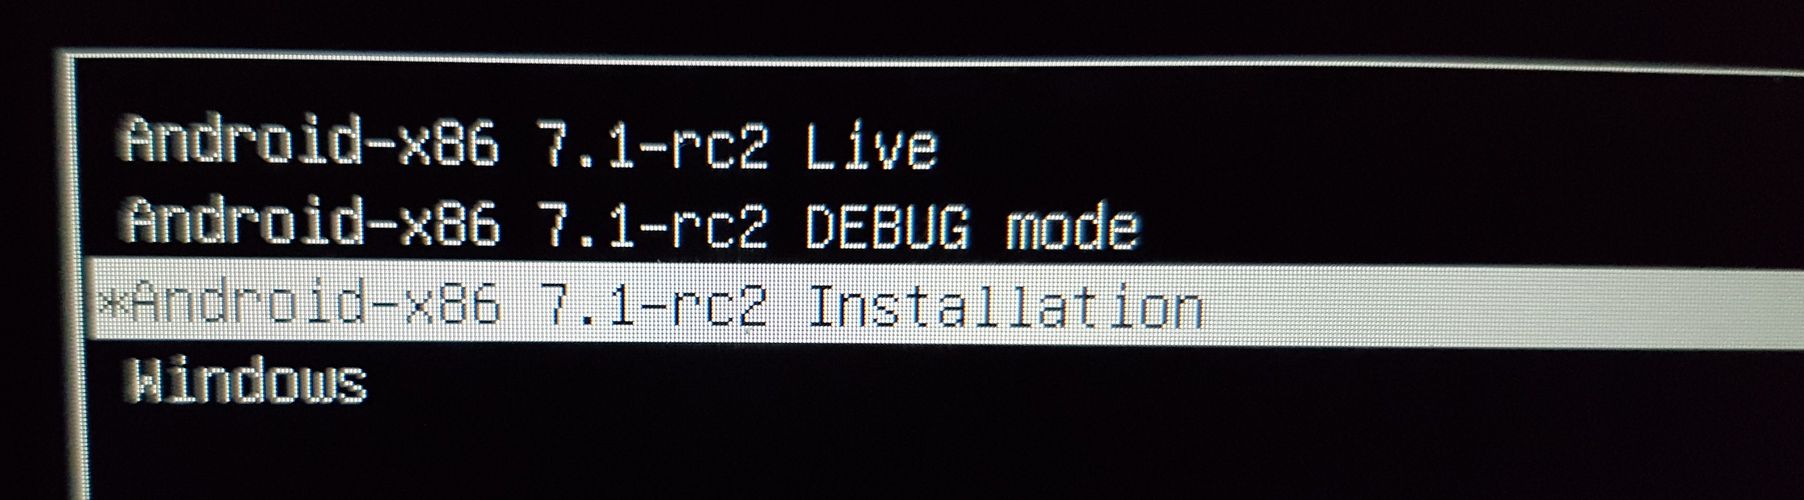
The Android-x86 GRUB menu will show up, choose the third option:
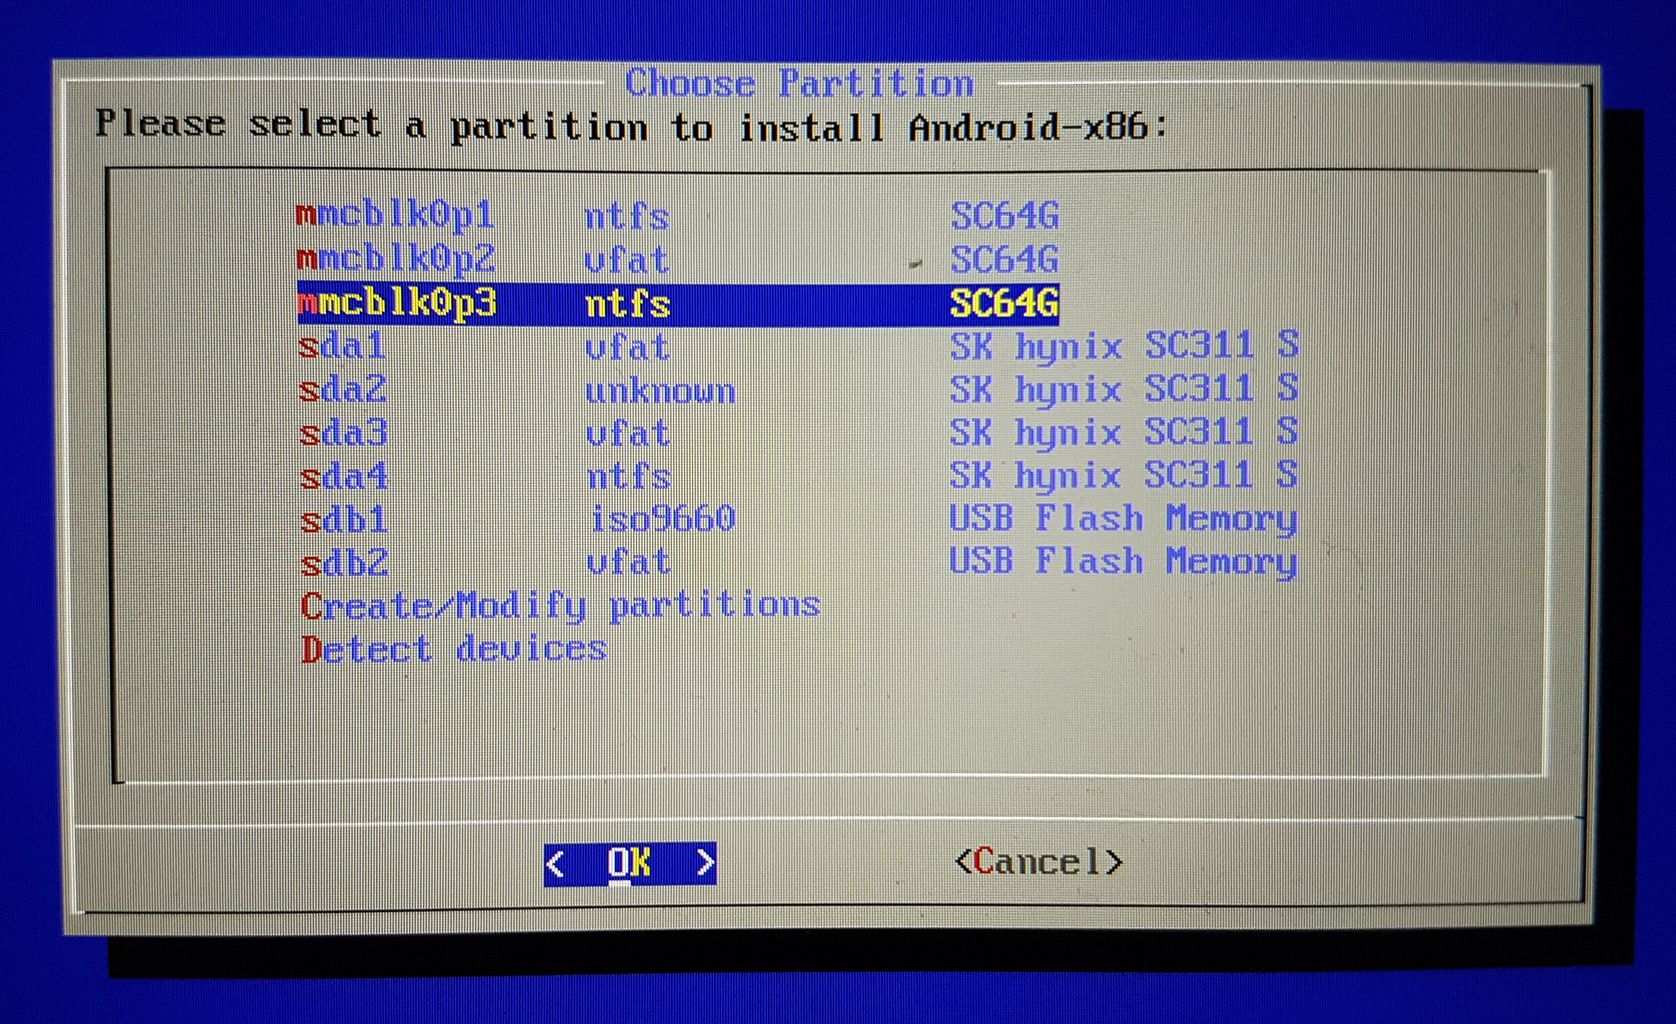
When you are faced with the list of
devices/partitions where you can install Android-x86, you might notice that the
partitions of your microSD card are missing (they are in the Dell Latitude
7480). This depends on the manufacturer of the microSD card reader but my
expectation is that they will be missing more often than not. In order to make
the partitions show up on the list, the correct kernel module for the card
reader needs to be loaded. For the Dell Latitude 7480 the module name is rtsx_pci_sdmmc,
but it may be different in other computers. One way to find the name of the
module is to launch another Linux-based OS such as Ubuntu or Parted Magic and
running the following commands to inspect their output and obtain the name of
the module:
$ lsmod | grep –i sd
$ lsmod | grep –i mmc
$ lspci –kv | grep –i card
Or by finding out the module driving
/dev/mmcblk0p1, for example. You can check here for more information at [1]
Once you know the module name, in my case rtsx_pci_sdmmc,
just boot the Android-x86 usb drive again and, once on the list of partitions,
press Ctrl+Alt+F2 to switch to tty2 and run the following command (modify
accordingly):
$ modprobe rtsx_pci_sdmmc

Then press Ctrl+Alt+F1 to go back to tty1 (where
the list of partitions is), and select “Detect devices”. Hopefully, the 2/3
partitions of your microSD card will now show up and will probably be called
mmcblk0p1 and mmcblk0p2 and mmcblk0p3. The numbers will reflect the order of
the partitions you created earlier (first to last), and the filesystem type
will also give you another indication as to which partition is which.
Choose the microSD card NTFS partition as the destination of the Android-x86 installation.
When asked if you want to install EFI GRUB, say yes.
When asked if you want to make the /system
partition read+write, say yes.
When asked how big you want the /data partition
to be, make it about 1500MB if you chose to have a 4GB NTFS partition. For
every additional GB your NTFS partition has, add an additional 1024MB to the
/data partition size. I am using an NTFS partition with 23GB and my /data has a
capacity of 20GB. If the microSD card isn’t very fast, you might want to try
with only 600MB to make it quicker just so you can check if Android-x86 works
in the end (and then repeat the installation with more space for /data).
Then wait from a few minutes to more than an
hour, depending on the /data size and the microSD card speed.
When finished, select Reboot. However, Android-x86 won’t work out-of-the-box after rebooting.
Making it boot
At this point, Android-x86 is already installed on the microSD card. However, the USB installation drive/media will be used one more time in the next section, so keep it around.
To make Android boot there are 2 important issues that need to be corrected (might be only 1 in some cases):
- Just like
rtsx_pci_sdmmc(or another module) was missing during installation, so will it when Android-x86 attempts to boot (the initial ramdisk that GRUB loads, which is then supposed to load the rest of operating system, will not include the microSD card reader kernel module by default, and so will simply fail by getting stuck inDetecting Android-x86………………………… - Additionally, the initial ramdisk (
initrd.img) and related files (kernel andramdisk.img) will be present in the NTFS partition but GRUB will not be able to read from the NTFS partition because 1) GRUB was not installed with the NTFS GRUB module and 2) even if it was (or if manually installed), Secure Boot will prevent GRUB from reading non-FAT partitions. So, with Secure Boot disabled, one could copy thentfs.modfrom another GRUB and then issueinsmod ntfsandset root=’(hd0,3)’assuming the card reader ishd0, before the existing GRUB commands for the Android-x86 boot entry, and it would work (but again, Secure Boot needs to be disabled).
At this point, go back to your Linux installation or Linux live image.
There, 3 things have to be done with regards to the partitions and files from Android-x86:
- Extract the Android-x86 squashfs image in order to search and copy necessary kernel modules;
- Copy missing kernel modules to the initrd image;
- Copy new initrd image, kernel and ramdisk files to the FAT16 partition instead of the NTFS partition.
The next section will go through all of this.
Get the necessary kernel modules
To get the necessary kernel modules for booting
Android-x86 (only rtsx_pci_sdmmc and its dependency rtsx_pci in my scenario –
you should look for the dependencies of the modules you need using the lsmod
command). The Android-x86 live squashfs image should first be extracted so that
you can access its files. So plug in the live USB drive and mount it in your
Linux system. Then follow the following steps:
$ cd && mkdir sfs # create a directory locally to store the squashfs contents
$ cp /path/to/android_x86_live/system.sfs ~ # copy the system.sfs squashfs file
$ cd && unsquashfs system.sfs # extract the image from it
$ mount -t ext4 system.img sfs # mount it to the directory we created earlier
$ cd ~/sfs/lib/modules/4.9.54-android-x86_64-gfb63269e5ada/kernel # change kernel version here accordingly, if not using 7.1rc2
$ find . -name *rtsx* # find the path to the missing module (and similarly named ones)
./drivers/memstick/host/rtsx_pci_ms.ko
./drivers/memstick/host/rtsx_usb_ms.ko
./drivers/mfd/rtsx_pci.ko               # yep, I need this one
./drivers/mfd/rtsx_usb.ko
./drivers/mmc/host/rtsx_pci_sdmmc.ko    # yep, I need this one
./drivers/mmc/host/rtsx_usb_sdmmc.ko
You now know where the needed modules are, so let’s temporarily switch to something else: getting the original initrd image in order to later update it with the additional modules.
$ cd && mkdir initrd # create a directory locally to store the initrd contents
$ cp /path/to/android_ntfs_partition/android-7.1-rc2/initrd.img initrd/ # copy the initrd file
$ cd initrd && mv initrd.img initrd.gz
$ gunzip initrd.gz
$ cpio -id < initrd # extract the cpio-archived initrd image
$ rm initrd
The initrd image is now extracted, so you can
modify it as needed. In terms of the microSD card reader kernel module, the 2
modules above will be copied to initrd and will be loaded by changing one of
the scripts (the same one that issues the Detecting Android-x86 message).
$ cd ~/sfs/lib/modules/4.9.54-android-x86_64-gfb63269e5ada/kernel
$ cp ./drivers/mfd/rtsx_pci.ko ~/initrd/lib/modules/
$ cp ./drivers/mmc/host/rtsx_pci_sdmmc.ko ~/initrd/lib/modules/
$ vim ~/initrd/init # use any editor you feel comfortable to edit this file
Inside the init file, look for the following:
echo -n Detecting Android-x86…
Before that (should be around line 135), add the following:
echo "Loading SD card reader modules (rtsx_pci, rtsx_pci_sdmmc)… (credit: igordc.com)"
busybox insmod /lib/modules/rtsx_pci.ko
busybox insmod /lib/modules/rtsx_pci_sdmmc.ko
sleep 2
What these lines do is to simply load the modules manually, from where we copied them to (although from the perspective of the initial ramdisk already running, so don’t doubt that the paths are correct in the lines above).
Change the message in the “echo” line however you want, or remove it.
Now that the initrd image is finally ready, it’s time to turn it back into a single file.
$ cd ~/initrd
$ find . | cpio -o -H newc | gzip > ../initrd.img
And copy that file, along with the ramdisk and kernel files that are in the NTFS partition, into the FAT16 partition. This will make GRUB find the files even if Secure Boot is disabled or the NTFS GRUB module is not present.
$ mkdir /path/to/android_fat16_partition/android-7.1-rc2
$ cp ~/initrd.img /path/to/android_fat16_partition/android-7.1-rc2/
$ cp /path/to/android_ntfs_partition/android-7.1-rc2/ramdisk /path/to/android_fat16_partition/android-7.1-rc2/ramdisk
$ cp /path/to/android_ntfs_partition/android-7.1-rc2/kernel /path/to/android_fat16_partition/android-7.1-rc2/kernel
Happy booting
With a fixed initrd.img together with a new
location for it and its relatives, GRUB should now be able to boot the initial
ramdisk which should be able to automatically detected Android-x86 on the
microSD card, since any missing kernel modules will now be loaded.
